
A couple years ago a friend told me about dyeing eggs with silk ties – an idea she picked up from Martha Stewart Show staff member, Jackie Manzolillo, who picked it up from her Great Aunt Helen, who picked it up from her grandmother. It’s a family tradition. And if there is one thing I can’t resist, it’s a craft project with lineage. Of course I had to try it, and of course the eggs came out great. If you haven’t seen the original video, you should, ‘cause there be some serious granny cuteness going on. And yes, the results are mucho mucho impressive.
Since I like to try a new egg dye technique each year, and that one came out so well, as did my tissue paper eggs from last year as well, I thought; why not cross the two?

The end result is a swirling dervish of sparkly pastel Easter goodness. This is an easy project that relies on little more than bundling and soaking — both are very kid friendly, especially if you use hard boiled eggs instead of fragile, hollow eggs. Of course, I would avoid eating eggs that have been boiled in garment dye but I wouldn’t think twice about setting them out on the coffee table.

Materials
- Eggs with their guts blown out (see this video)
- Silk neckties (can also use scarves or fabric scraps – must be 100% silk)
- Tissue paper cut into long strips (dark colors work best)
- Non-metal pot (I used my slow cooker, but you can find ceramic and glass pots at the thrift store – no metal)
- Vinegar
- Coffee filters
- Dental floss or strong white thread/twine
- Mod Podge
- Gold Paint Pen
Again: watch the original video. That way you can skip most of these directions. Or piece it together from the pictures. I love craft tutorials with more pictures than words, don’t you? Brevity is a virtue. I ramble too much but I’m good with sequins – that’s my virtue.

The number of eggs will determine how many neckties you need, but I would estimate 4-6 eggs per tie (I found these ties at the thrift store for 50cents each. Not all neckties have obvious fabric indication tags, but if a tie is 100% silk, there is a decent chance the manufacturer will brag about it with a big ol’ tag).
Cut the tie apart into pieces large enough to surround each egg, roughly 5″ square or larger.

The dying process is based on a simple bundling technique.
Egg > Tissue Strip > Silk Piece > Coffee Filter > Tied Together with Floss
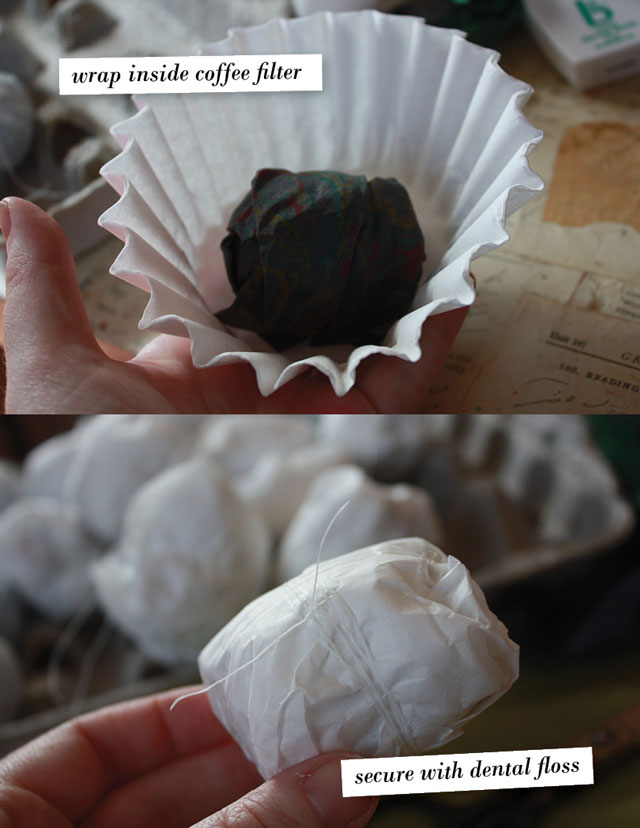
Use tongs to submerge the egg bundles in hot water (not boiling) with a splash of vinegar. Leave them there to soak. Be sure to use a non-metallic pot, as it will react with the acidity of the vinegar and effect the dye process. I don’t know about you, but I don’t have any non-metallic pots sitting around so I resorted to using my slow cooker with a ceramic insert. The slow cooker also allowed for a clamp-on lid, which was helpful in keeping the eggs wet, even if they insisted on floating (fully submerging eggs in a crowded pot isn’t easy).

You will have to experiment to see how long they stay in there. Some dyes will release in a few minutes, some will take a few hours.
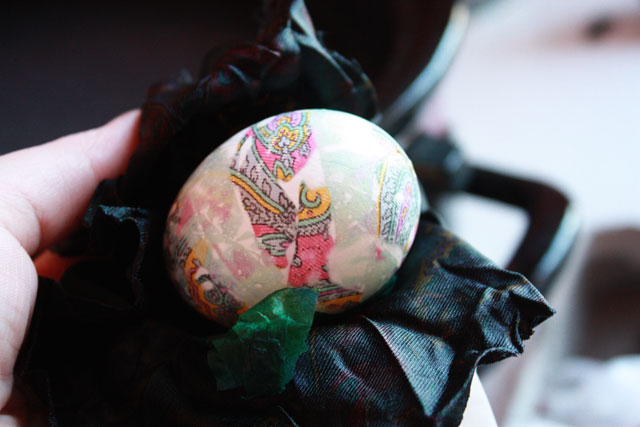
As you can see, the paisley print was a direct transfer in some spots, while the strip of green tissue created reverse-print stripes in other spots. The overall effect is very muted and pretty. And abstract. Which is a nice way of saying no one will notice if you make a mistake. Don’t you love that?
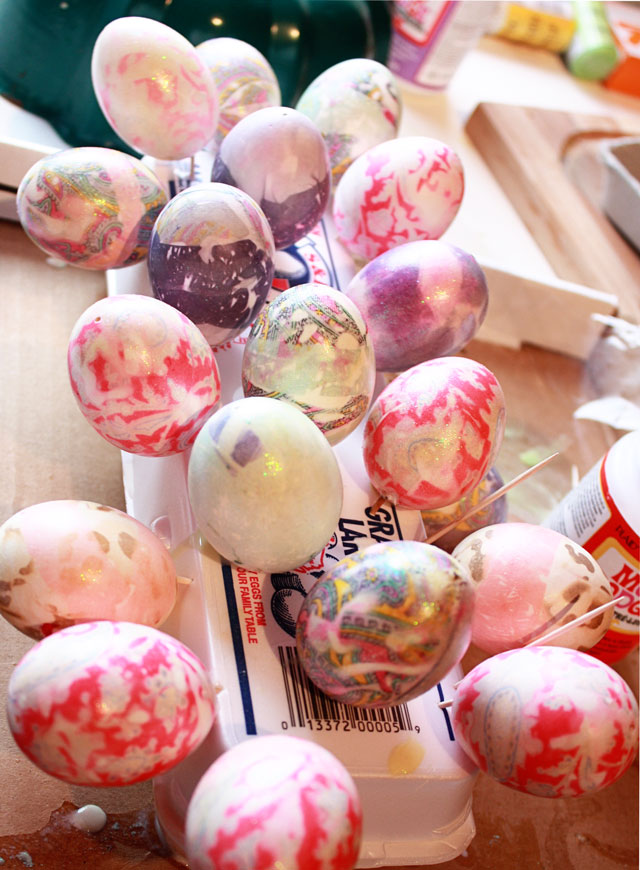
It’s important to coat the outside AND the inside with diluted Mod Podge (we went over this last week). I also added a dash of glitter paint to the mix. Because, you know, I’m tasteful.

Now for the fun! Use the ‘stripe’ created by the tissue paper as a guide on where to use your gold paint pen. I chose to draw staggered vertical stripes along the outer borders of the stripe. I was trying to give the visual impression of “music” but it came out looking more like an “earthquake.” Hence the name of this project, Golden Seismograph Eggs.

I almost gave them the name Earthquake Eggs but I like the word seismograph. I also like the words mercurial and besmirch. Last week I was on the phone with a guy who used troglodyte in a sentence without even trying. Man, some people are so cool!

Interested seeing some other folks dye eggs with neckties? Check out Dabbled and Parents Magazine.
makes me want to re-convert!
Very cool! Missing the blowing-the-guts-out-of-eggs link, though. 🙂
Good catch, thanks!
I know, right? Someone needs to figure out a way to incorporate more glitter into Passover. Moses would approve!
Pretty eggs. I thought the gold looked more like feathers. Which makes it a weird, ‘which came first,’ catawampus sort of thing. I like catawampus and differential (I’m taking calculus and now differential has a whole new meaning) and discombobulated.
mercurial and besmirch are two of my favorite words. I also admire plethora. Having typed that I must say, you have a very engaging plethora of eggs. Tres belle!
Thanks for the reminder about using silk ties to dye Easter eggs! I did this a few years ago with my son and his friend, http://youtu.be/W5oewa4t_bI. So much fun! I’m gonna try your coffee filter wrapper idea and embellishments next time.
This is SOOO great!
What a great tutorial.
I may just have to try this!
I linked to this
(and a couple of your other post—your tribute to Mr. Rogers
was so great!)
on my very small blog today because I loved it all so very much!
Thanks so much for this golden tutorial, I love it.