I need another decorative pumpkin like I need a hole in the head, but you know what? It’s October. *It’s Decorative Gourd Season, Motherfuckers.
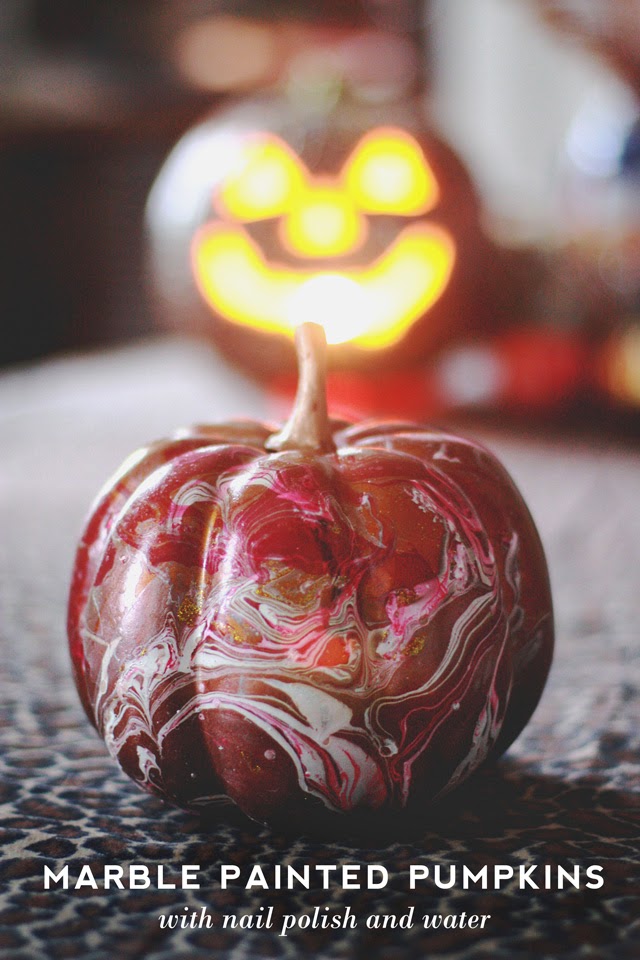
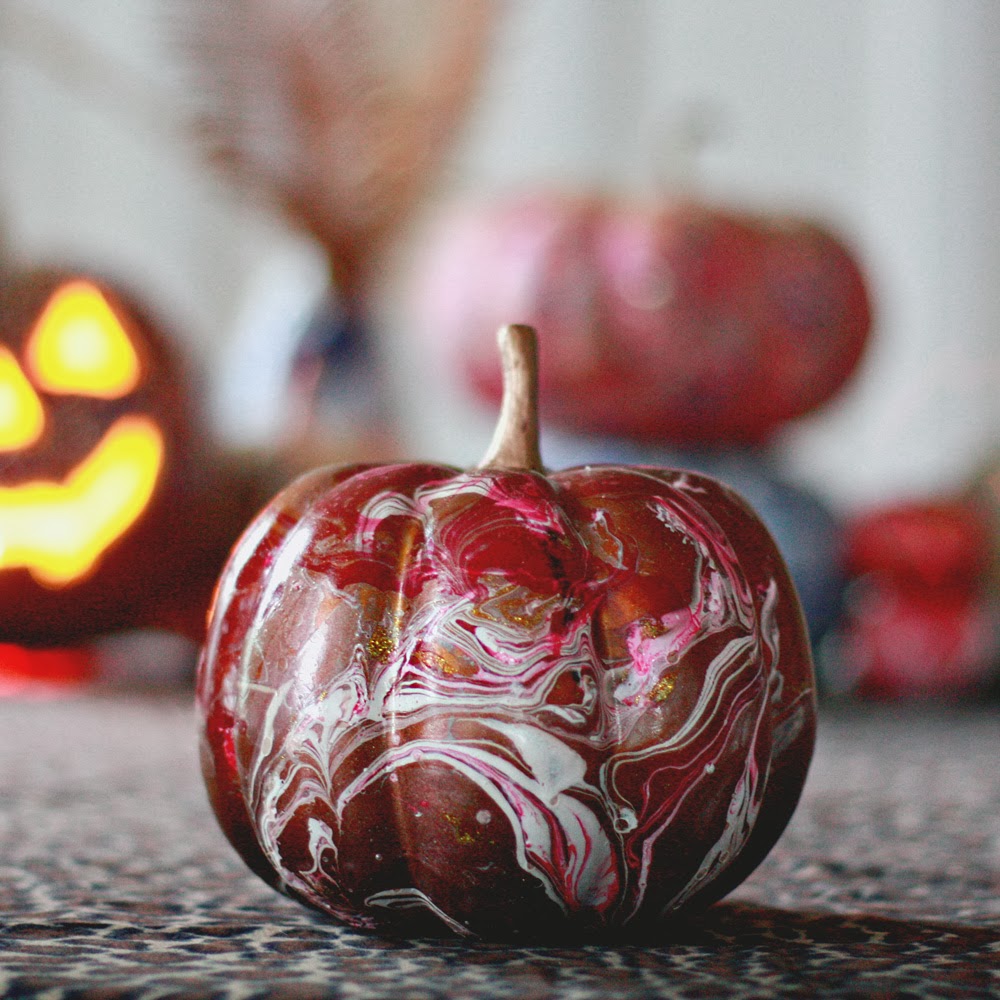
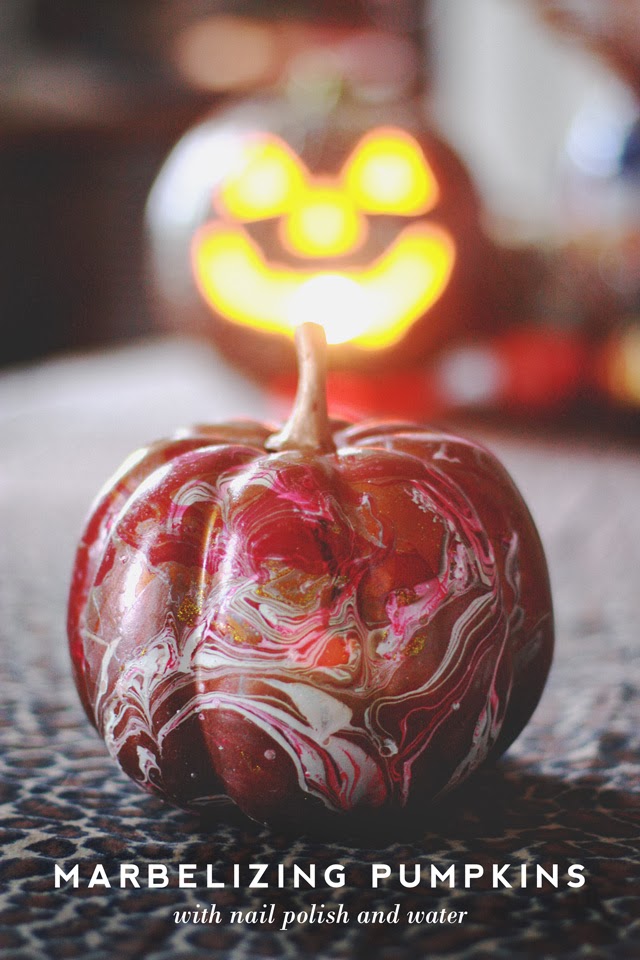
* You should totally click that link. It’s good reading. That is, unless you are offended by curse words, in which case, you might want to skip it. Skip this post altogether, for that matter. There won’t be any more curse words in it but several were used in the making of this pumpkin. This big fat, gorgeous, tainted in profanity pumpkin. And look, it’s marbleified!
Materials
- Three+ bottle of nail polish. ($5+) Feel free to use your old goopy stuff, but if they have thickened up they may not spread as nicely (solve this problem by adding a drop of nail polish remover to the bottle a shake for one minute – that’ll thin it out a bit).
- One Pumpkin ($1+) I used a foam pumpkin because I want to keep it for years to come. In retrospect, I wish I had gone to the grocery store and purchased a variety of 50cents-a-pound mini gourds instead. They won’t last past the season but the shapes and texture would be super interesting! Also, foam shapes can be tricky to dunk in the water as they will want to float, but we’ll get to that in a sec.
Not pictured (Free)
- Bucket of water (Free) Technically, this might not be free since your bucket will probably get nail polish all over it, so if you are the type to keep a Best Bucket, this is not the time to use it.
- Bamboo skewers or plastic utensils
- Paper Towels

Directions
- Drop nail polish into water and watch it float to the surface. Don’t get to precious about it, just dribble five to ten drops and move on to the next color. The colors will most likely blob together, but not blend together. That’s good.
- Use your bamboo skewer or a plastic utensils to draw straight lines through the blob of color floating on the surface. I find the best technique is to draw long, straight lines, then let the water movement take care of the curving action. It’s a matter of preference.
- Use one hand to dip the shape into the surface of the color blob and hold it below the surface. Note, if the pumpkin has a front side/good side, dip that side first.
- While the pumpkin is still submerged with one hand, use your other hand to wipe a paper towel along the surface of the water and watch all the nail polish cling to it. The surface will now be clean and you can pull the pumpkin out.
- Let it dry on an old tin can or a wire wrack – something non-porous (paper towels will clean and foil will smudge). The water beads will drip off and the whole thing should dry within 20 minutes or so.
I’m hoping this makes sense. If you want to see a video of someone using this marbeling technique, click here. She is doing a manicure and not a pumpkin but the essentials are very much the same.

Notes
- This needs to be done outside or in a well ventilated space. Very well ventilated. Nail polish is no joke.
- Glitter nail polish does not play well with others. Maybe you will have better luck, but I found it to clump up and ruin the swirl pattern of the other colors. Iridescent/pearlescent polishes, however, came out gorgeous.
- Colors will appear more vibrant if the pumpkin is painted white before dipping (regular white craft paint is fine, just make sure it dries first).
- Experiment. Before dipping my pumpkin, I got a feel for the process by dipping some tangerines that had gotten a little old. I like the results so much I mingled them in with my other Liberace pumpkins from last year.
Peaches! Oohmygoshhhh, that is gorgeous!
Thanks Michelle!
Wow, now I have some use for all the old red nail polish that I have. You can line your Best Bucket with a plastic bag to protect it. Also, can you imagine what this would be like on Christmas Ornaments?!! Ann
That’s a great idea, with the bucket! I was totally thinking about plastic Christmas ornaments too — can you even imagine? Maybe even pinecones…who knows?!
PINECONES?! Yes!! I like the ornaments idea too, because I am DONE with plain ornaments 😀
Need to try this! (Especially after my nail polish collection grew quite big over the last weeks… because I started using them behind glas cabochons to make earring studs… and if you take one or two new colours after each grocery trip… the add up really fast! ^^)
They do add up quick, don’t they? I keep my collection under ten, most cost a buck…but I swoon after the $8 bottles every time I wander through that aisle. Tempting!
thank you for the great link… i laughed out loud motherfuckers! and… i also just read your post about the shutdown. i love you even more! happy fall.
🙂
HI there – can’t wait to try this but need some addt’l help – sorry, I’m kinda slow 😉 First of all, do you think you could do this with acrylic craft paint instead? Second, I don’t understand #3 and #4 in the directions – maybe you could explain them like you were talking to a kindergartener? LOL
Thank you so much!
Hi Crystal, To answer your questions…
*No, acrylic paint won’t work with this method very well. It needs to be an oil based paint (nail polish, spray paint, oil paint etc). Oil and water don’t mix, that’s the key to getting the marbling. Acrylic won’t immediately mix with water, it’ll just glob up on the surface for a minute then start to mix in.
* I’m afraid I did my best to explain steps three and four, but I can see how they might be confusing! I would be too 🙂 ….That’s why I included that link below the directions to the youtube video of the lady doing this to her fingernails. You can see the dunk-n-swipe method in action. Hope she can do a better job than me!
Good luck 🙂
Update! Just saw this post on marble painting with food coloring and shaving cream. No idea if it will work but it looks mighty nifty. See what you think: http://happyhooligans.ca/shaving-cream-and-food-colouring-2/
Thank you I appreciate it! Hope to try it tomorrow or Monday!
Oooh another thing to marble with nail varnish! I am loving this technique
OMFG! U TOTALLY read Mc Sweeney’s!!!!!!!!! I love u! U also made me miss my YOGA TREE in Andersonville
Yuha! McSweeneys is the best!!!