Please note, I did not set out to create a lamp that looks like glittering bacon.
Yes, I’m weird, but not that weird.
Yes, okay, I have a painted sofa and keep chocolate in the bathroom…
I have been known to eat pie for breakfast…
My favorite color is possum fur...
But I give you my word, I did not set out to make a lamp that looks like glittering bacon.
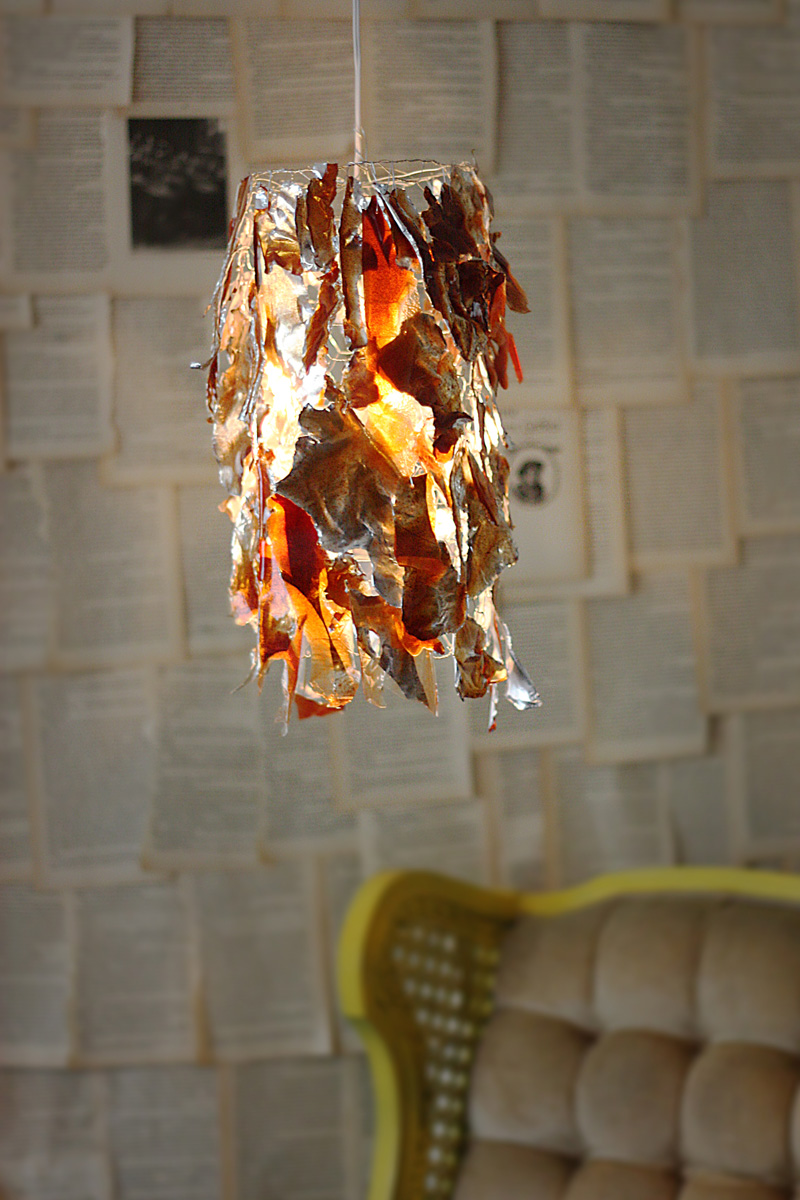
It started out something closer to a fruit leather chandelier, but sometimes things take a new direction and you are left with something that resembles “the peeling paint off an old truck” or “rusted roof shingles” or “the scales of a fire breathing dragon” or “the bellies of koi fish” or “glittering bacon!”
And, well, with options like that, you just know the bacon had to win out.
Old truck my butt.
 I have to be honest and tell you that this project did not come out anything like I expected. I had worked with resin in the past and loved the results, so when ETI sent me a box to try out, I jumped at the chance to experiment. My previous experience working with resin led me to believe it would peel away from aluminum foil. Wrong. Wrong. Wrong.
Initial Plan: Pour blobs of resin on aluminum foil, let it dry, peel away the foil, then hang the remaining pieces on an embroidery hoop like illuminated pieces of fruit leather. Sounds cool huh?
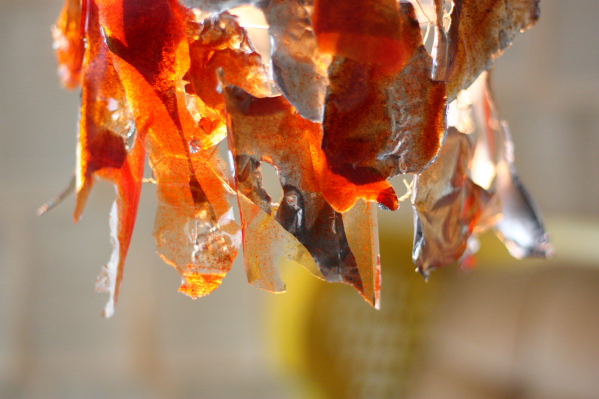
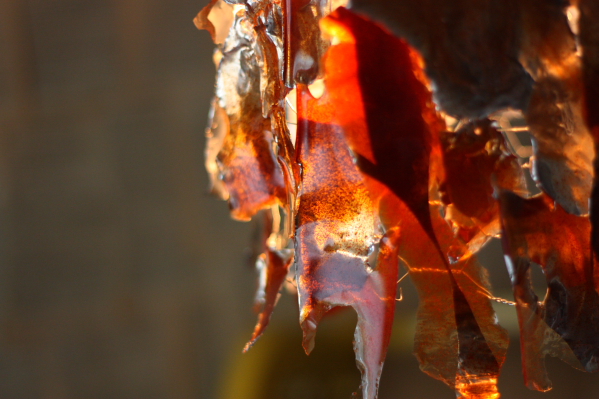
Reality Check: The resin stuck to the 80% of the foil. It peeled away from the 20% where resin was laid on really thick…and even though that was really frustrating, the end result was far cooler than I expected. Whoooopeee! The foil’s rippled texture showed through the resin and the jagged shapes looked like dragon scales. Awesome. Awesome. Awesome.
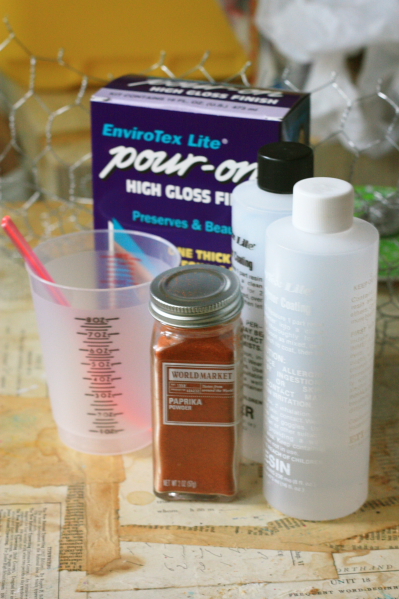
- Envirotex Lite High Gloss Finish. This includes two 8oz bottles of Resin and Hardner.
- Measuring cup and disposable spoon
- Paprika
- Aluminum foil
- Chicken wire
- 28 gauge wire cut into 2″ pieces, or leftover ornament hooks
- Light chord kit
- REQUIRED: open window and a working fan

The resin is going to spread while it dries, sort of like baking cookies, so you need to set down parameters. I thought about using aluminum cupcake liners, but decided I wanted more abstract shapes. I grabbed a 5′ piece of foil, then used my fingers to pinched 1″ pleats into the foil. Then I crimped up the edges, leaving a series of rectangular tray-like shapes. This is a very aproximate thing, no need to measure, just set up some guides so the resin doesn’t blend into one giant blob.
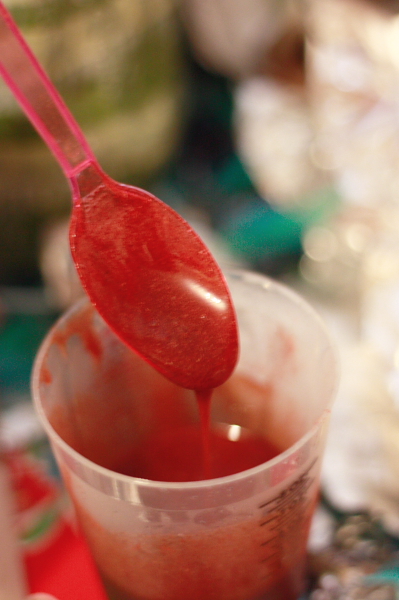
Now for the fun part! Mix together 4oz of hardener, 4oz of resin, and 2 tablespoons of paprika. Mix vigorously for at least 60 seconds. The end result is roughly the consistency of maple syrup.
Note: Be precise and follow the directions. Sloppy measurments can lead to sticky spots.
Note: You need to do this in a room with excellent ventilation. The smell is not bad at all, but don’t mess around with fumes. Open a window, turn on a fan, and use a mask if you are sensitive or doing a giant batch.
Note: I used paprika because I wanted a rusty red color, but you could use all sorts of spices or dry pigments to color the resin. I have had some success using old eyeshadow colors as well. Experiment for yourself, but I would be warry of using any sort of water based paint for fear it would tinker with the chemistry of the resin. Hmm, now I type that, and, in theory, the water should just evaporate away…meaning the drying time would be slowed but the pigments would remain. Hmmm, well, I’ll have to try it out and show you next time!
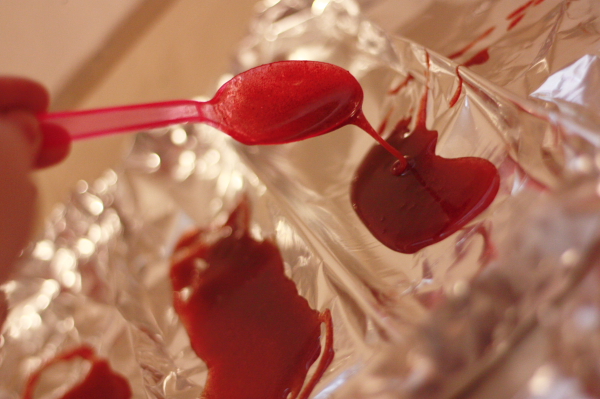
Use the spoon to pour blobs. Don’t get precious about it. It will shape itself far better than you can dictate, so let it go and loosen up. Let it dry 24 hours minimum. Be prepared to wait longer if you live in a humid climate or are doing this during a rainy season.

When it’s dry, tear away the excess foil.
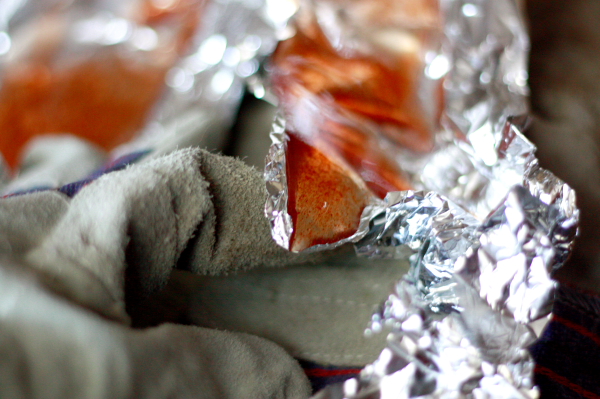
There will be lots of jagged edges, and even though foil isn’t sharp, I didn’t want it straggling and looking all angry and sloppy like, so I put on my leather gardening gloves and rubbed all over the edges. This process tore away any ugly bits and softened the sharp edges. If I wasn’t such a lazy lump, I would have broke out the sandpaper, but that was asking way too much on this one.
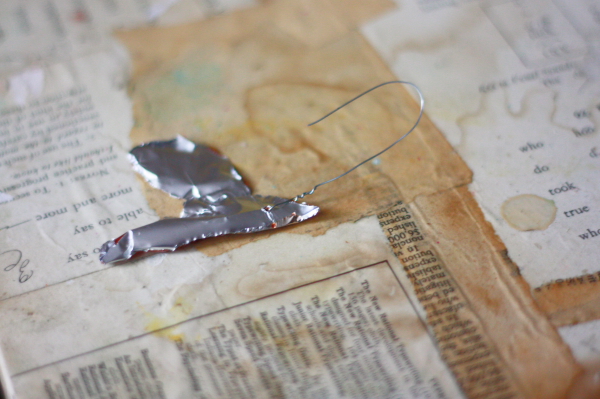
Thread the wire through each piece and twist it like a Christmas ornament. Heads up, you might need to make your holes using a needle or a drill, depending on the thickness.

Making a lampshade out of chicken wire is easy –it’s just a simple tube. However, I realize not everyone is comfortable snipping wire and twisting it together, in which case you could certainly use a base made from an old wire lampshade. Or a birdcage. or hanging basket, or anything with little nooks for hanging. I hate that I just typed the word “nook.”

Starting at the bottom, hang each piece on the chicken wire, twisting as tight as you see fit.
 Build layers upward. The tin foil is will block light, so I made sure to leave gaps and nooks (THERE IS THAT WORD AGAIN) for the light to peep through.
TaDa! You have an illuminated bacon lamp.
If bacon lamps aren’t your thing, there are out oodles of other creative projects that use ETI’s products featured on their blog. You can also check them out on facebook and the twitters.
Send me pictures if you make something!
With a title like “Glittering Bacon Lamp” you just can’t go wrong. There was NO WAY in heck that I wasn’t dropping everything to come and see what you were up to! And you didn’t disappoint either. How your brain decided to pour resin onto foil in the FIRST place, and THEN see the bacon-ness of it all, is what intrigues me most about this project… Too crazy and fun Peaches!
sorry if this is creepy, but I Love You.
FUNNIEST CRAFT MATERIALS LIST EVER. I was already giggling, but when I got there, it was TOO HILARIOUS. I had to bury my head in my elbow nook to avoid scaring the new neighbors.
Also, I love the lamp.
Ooh, I wish I would have known about the old eyeshadow trick before I made my glittery snowflakes. I could have done more experiments…
BTW, I think you should hang your glittering bacon lamp in your breakfast NOOK.
You know Lady GaGa is going to want to borrow this to wear as hat:)
I can’t say it is a fail because it is unique and interesting and would be a good conversation piece.
This is fantastic!
I’ve never seen anything like it, great project :]
Thank you for sharing.
Hihi… the name is just the greatest ever!
It looks quite cool and the shine in the last pic is beautiful 🙂
How very strange! And we all know strange is beautiful.
Yeah, it DOES look like bacon in the first picture, but I reckon (unless all the other pictures are deceiving) that in the flesh (no pun intended) it’ll be a lot different.
Certainly something I’d love to try, especially since you used paprika as pigment. You just lit a big ACME- style lightbulb above my silly old head!
I just KNEW when I saw the word “bacon” in the linky on my site that it would take me to Aunt Peaches!! 🙂
I had a few craftfails with resin, too… check out the moldy veggie heart: http://craftfail.com/?p=1617
Oh, so pretty! I just know the window dressers at Anthropologie are drooling!
xo Mary Jo
Bacon Aunt Peaches, bacon!? really….
Sorry Stella! Please note, no swine were hurt in the creation of this lamp 🙂
this is very cool! when I saw “glittery bacon lamp”” I was like whqat the h***!!!!!
but now that I see it , it really gets my juices flowing!!
come visit me..
http://kristietaylor.blogspot.com/
I know several breakfast establishments that would fight over this.
At last! The perfect gift for the bacon lover who has everything! I love it and I’m in awe of your creativity. You bet your bacon I’ll be spreading the word about this.
What an intriguing title, of course I had to look! And I wasn’t disappointed – thanks for the great laugh! My first experiments with resin ended up with a potion-like mixture which bubbled and smoked, so this stuff creeped me out.
Your bacon lamp could actually convince me to give resin another try 😀