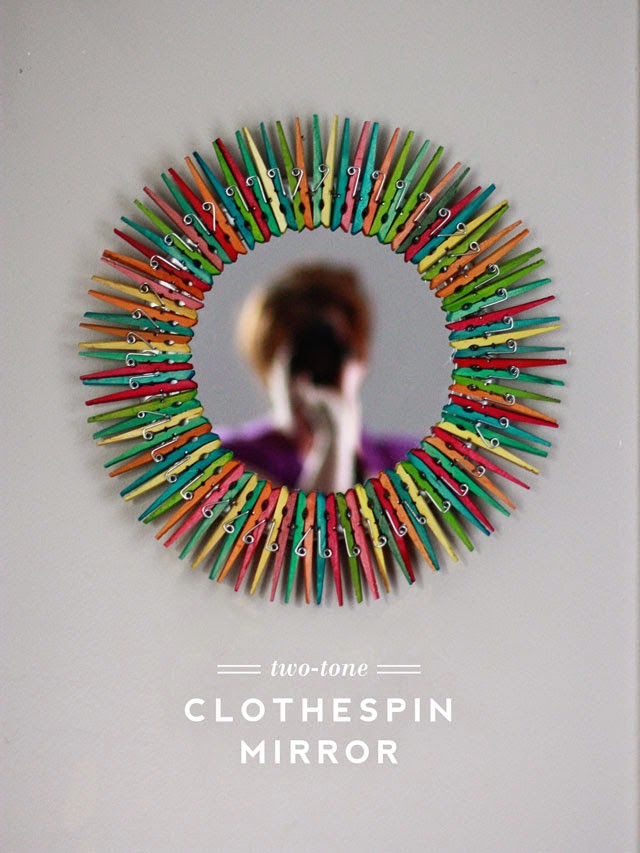
Last week I mentioned I started dyeing clothespins. It was weirdly cathartic. I haven’t had a lot of time for craftasticness the last couple of months so the act making stuff pretty by letting stuff sit in plastic cups rubbed me the right way. In fact, it rubbed me so right, I made 300 of them.
Three hundred.
Do you have a use for 300 clothespins?
Yep, no. Neither do I. SO let’s do what we do best and glue them a mirror and call it a day. K?
K!
You won’t even believe how easy this is. You’ll make one and then it’s be so rad you’ll want to make ten and give them to everyone you know. Look at you!
The fun part is dyeing the clothespins — you’ll want to check out my tutorial over on Ilovetocreate.com for that. After you are done dyeing and drying, it’s nothing but ten minutes of hot glue glory, baby.
*It took me 48 pegs to cover the frame of an 11″ mirror. Your needs will depend on the size and how far in you want the pegs to cover the mirror, but you get the picture.
*Hot glue is fine for most surfaces, but if your base is plastic or metal, consider using tile adhesive instead.
* To keep the pegs from bunching up, make sure each peg points to the exact center of the circle (think of the second dashes around the rim of a clock). This might mean that your pegs lay with tiny gaps in between. I’m fine with this but if your frame base is not so pretty, consider painting it first.
*I laid my clothespins on their side with the tips pointing in. If you laid them flat and alternated their placement, you could turn this from a mirror into a memo board. Holla!
* Some folks commented after the first tutorial that they have a hard time reassembling the clothespins after they have been separated from the spring. I also found this difficult until I looked at a finished/ready-made/loaded clothespin as an example to figure out where the prongs and stuff went. However, if you are dyeing the pins just to get a frame situation like this, there really is no reason you need to bother with the spring at all; just lay the little peg-halves out side-by-side. Nobody will notice the spring is missing and it’ll still look super cool. We to be lazy AND awesome. Go you!

I can’t decide where to put it.

One last time: Pop over to I Love to Create to see how easy it is to dye clothespins. Let the fun begin!


Love it and those doors are awesome too!
This looks amazing!!!!! Great job! Reminds more of the day my granddaughter and I ate so many pistachios and we decided to dye all the shells! Yee-haw!!!!
Wow, this really looks fabulous! Love the colours.
I LOVE the color of your doors. Could you please post the brand and color of the paint?
Sorry, it’s been a few years and I don’t recall! Plus, most saturated colors look very different on camera — so, honestly, it wouldn’t be much of a match. For what it’s worth, my favorite brand is Sherwin Williams.