As much as I have been grooving on painting flowers lately, there is something really satisfying about a totally random abstract. No meaning or purpose – just color, color, COLOR. Michael’s asked me to show a new way to use one of their favorite brands – Liquitex paints. Lucky for me, they are one of my favorites too! And since this is the height of summer, I thought this would be a great chance to cool off with an old favorite: ice painting.

I know what you are thinking; Ice painting? Paint ice? What the?
Yep. Ice painting.
Ice made from paint. You just leave it to melt on the paper and it’ll make these colored puddles like WHOA. I learned to do this in nursery school (shout out to Palisades Pre K!) where we made paint puddles then when they dried we drew faces and legs on top. It was precious. I don’t recall what I made, but I recall it was really messy and that meant I liked it. That’s pretty much the criteria for a good craft – messy meter reading of 8 or more. This won’t be that messy for adults, or, play it safe and keep it outside. Your call. It can be an easy or sophisticated as you like it.

Materials
Liquitex acrylic paint
Watercolor paper
Water
Ice cube tray (you could also use baggies or disposable trays (any sort of plastic ‘bubble’ packaging will work fine too))
Toothpick or plastic fork (for stirring)
Paintbrush
Old towel (or work outside on the grass)
Note on paint: Ice painting can be done with lots of different kinds of paint, but I have found that using a full bodied acrylic like Liquitex will give you the most interesting and saturated results. You’ll want a paint with a lot of pigment. It needs to be water soluble to lend itself to ice, but thick enough to that some of it will resist melting into the ice completely (you’ll see the difference when it melts). I’m very fond of Liquitex because that was what was recommended as the standard in art school, and although they carry several varieties, I like the big tubes you can get at Michaels. They last for years. Literally, I just finished off a tube of white Liquitex from 1999. It’s a workhorse!
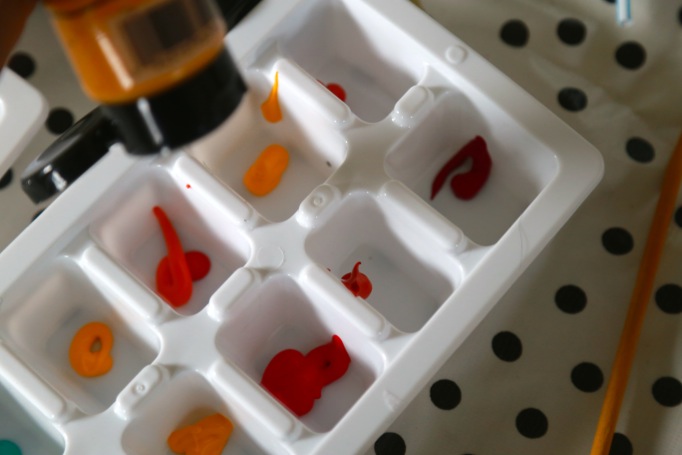
So, let’s start. Add a small amount of paint in each compartment of the ice tray (somewhere between 1/2 a teaspoon and a full teaspoon). You can get 2 ice cube trays at any dollar store, or you can line an existing tray with tin foil or plastic wrap.
Add a small amount of water. Maybe a teaspoon. DO NOT FILL (YET). You need enough room for the next step.

Use a stick or spoon to mix the paint with the water. Plan on it splashing around. Don’t worry about it blending completely (in fact you will get more interesting end results if you leave a few paint chunks)…just get the party started.
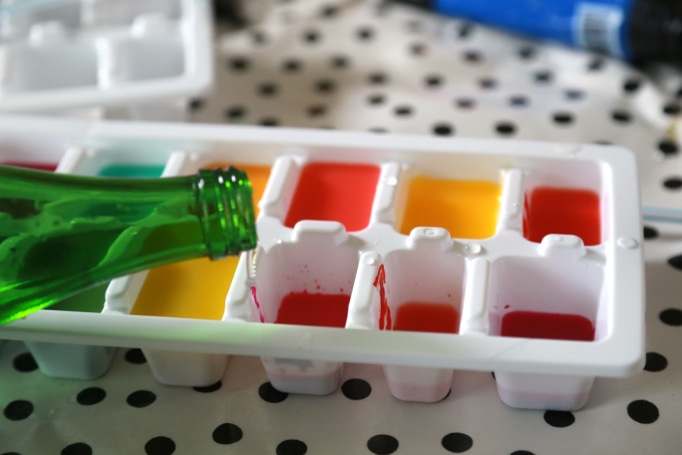
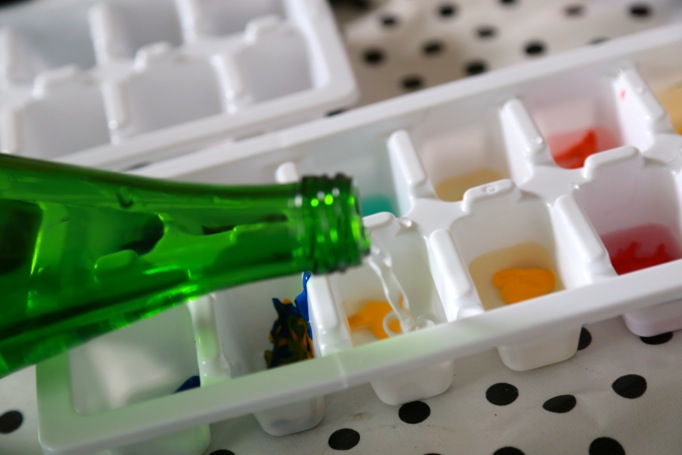
Now go back and add enough water to fill each compartment. Remember, water expands when it freezes so leave a little room on top.

Put it in your freezer and let it solidify. Most ice will freeze up in a a couple of hours, but I just let it set all night.
Now for the fun! When the ice is solid, plop it out onto a piece of watercolor paper. I like to crush a few of the cubes and let them run around the paper a little. You can actually paint like this, using the cube as a sort of brush, but I like the results that come from letting the ice do its thing.
Note, you really need an absorbent paper like watercolor paper for this. You could also use white fabric, or a cotton rag paper, but regular copy paper will just shred – get something absorbent.
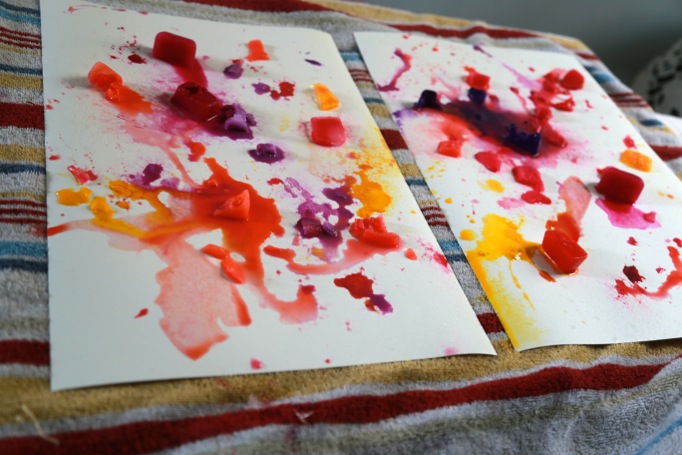
What you see above is what it looked like after about 5 minutes on the paper. The melting has already begun. You can see the colors starting to spread and mingle. Also, note the colors spreading off the edge and the old towel underneath. This is not a project you get to control, so just get ready for spillage.

This is what it looked like after 30 minutes. Still a few large cubes, but all the small ice crumbles have melted and mingled. This is one of the reasons I recommend using ice cubes in a similar color way for each piece of paper. If you do the whole rainbow on a single sheet they’ll melt into brown early on. Then again, maybe you want brown. I can dig that too.
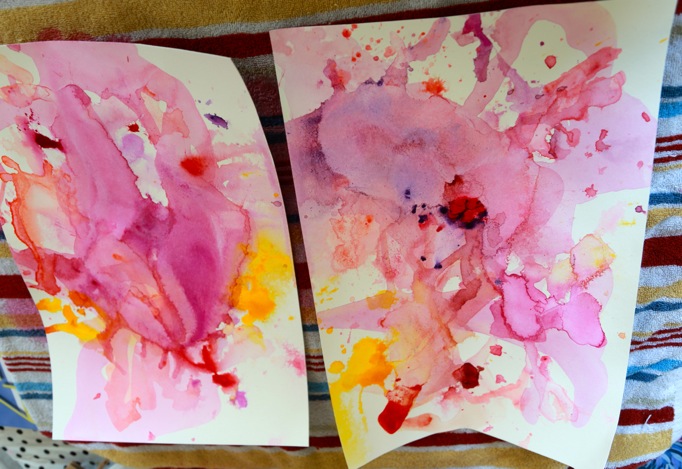
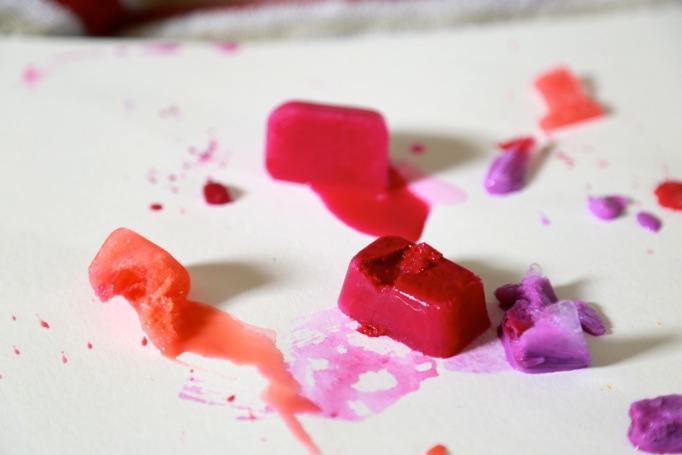
This is how it looked the next morning. I’m telling you, it has a mind of its own. The key here is DO NOT MOVE THE PAPER. Keep it on a flat surface and leave it alone. The paper will gradually start to warp and create peaks and valleys and that will distribute the color while creating the coolest patterns and stain ruffles.
Yes I said stain ruffles. That’s a real term. Those ruffles of color stains are what happens when you use a good, full bodied paint. See how the yellow runs from a deep sunset orange to a pale butter yellow wash? Yep. And it’s all from a single ice cube, crushed up and allowed to melt at different rates. It’s magic!

Now, here is the optional part: go back in and fill the white spaces with another paint color. It looks cool with a white background, but I like to pull out the color wheel and pick something to balance off the values I already have working here. Hey now, how about a crash course in color theory?

I don’t usually reference the color wheel, except when choosing final ‘accent’ colors, in which case I won’t finish a piece without it. I use it for painting, graphic design…even putting pillows on the couch or hanging art on a wall. You can make this really complicated but I like the triangle method, aka: three point color harmony.
Here goes: Identify the two most dominant color zones you have going on already, note their spot on the wheel, then use those two points to identify the opposite third point of the triangle. Sometimes it’s an equilateral triangle, sometimes it’s an isosceles triangle (<<brownie points to me for knowing how to spell isosceles)…but no matter what, the third point is always the opposite middle between the other two color zones. For some reason, adding a dash of calculated color always works out way better than anything I pick in my head. I don’t know why, but it does. I don’t fight it any more.
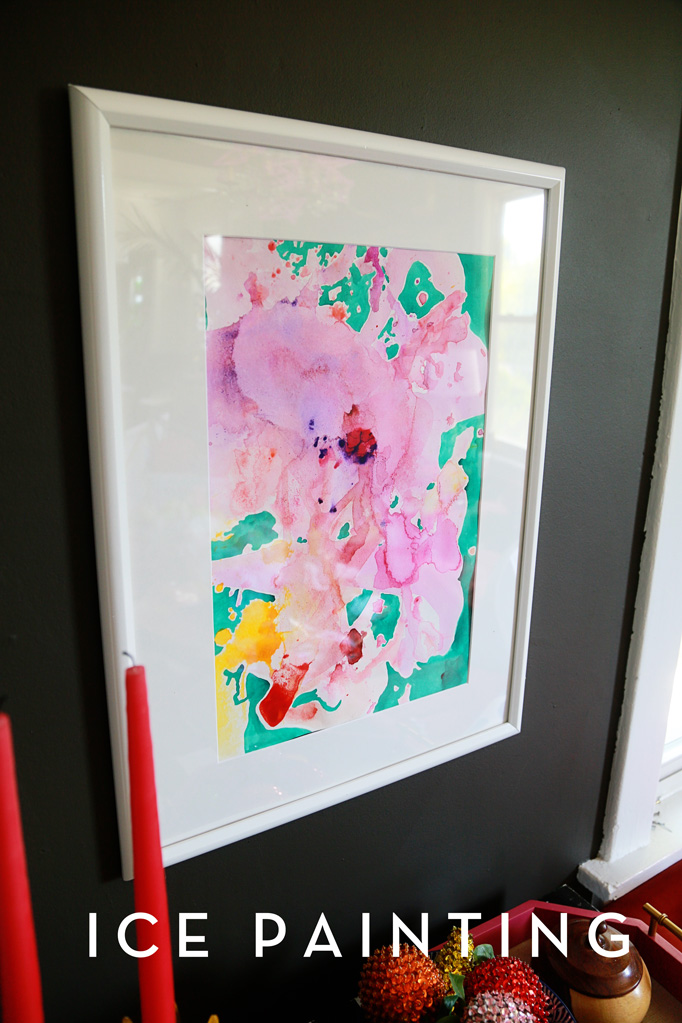
Now, just pop it in a frame and call it a day! Good news: You can also get the frame at Michaels. More good news: Michael’s is having their Big Brand sale next week so you can get major discounts on Liquitex paint for the next two weeks. The colors are intermixable so you can use them for all kinds of stuff. Check out all of the Liquitex products in store or on Michaels.com and check out the Big Brand Sale page for more details.
I love this! It looks very similar to the alcohol inks I use, but much easier to do. Set it and forget it!
Aunt Peaches, you are a peach!!! I can’t wait to try this project.
I’m so glad, Rasa!
Very cool project! 😀 😀 😀
Gonna hafta do this with the grand kiddos before school starts back.
“Line up! Line up! Everybody line up! It’s time to go outside!” (Me, watching too many Bubble Guppies cartoons!) Outdoor art project that involves water play? They’d be up for that 😀
I see ice paint t-shirts in my future…
This is way cool! (Literally, ha!). I’m definitely giving this a try come the summer…..it’s probably still too cold here at the moment to be fiddling with ice.
I love how you turn a pre-school activity into a stylish art form with some serious interior design possibilities!
Girl I love this! I seriously love doing this for one reason… To see it dry the next day. It’s crazy how it looks like a puddle of mud until the next day! Hugs, miss ya. Jaderbomb
Miss you too, lady!
Abstract art always turns into a Rorschach test for me. I see a ladybug on an arrangement of peonies. It probably says more about me that I always think abstract art has to be about something, huh? I’ve never tried ice painting, but I bet it’s something my kids would like to tackle with me!
Your kiddos will love it. And I bet you’ll like the results. Nothing stopping one from going back with a marker and drawing in ladybug legs 🙂
enthralled Aunt Peaches. wondering about a black permanent marker….just a teeny tiny bit of drawing.
Agreed. I have some others waiting for ‘level two’ embellishment. Stay tuned!
Can you do this on canvas?
Thanks for the idea.
Sorta. You can melt the paint ice on anything, but the puddle patterns might be less ‘interesting’ because readymade canvas isn’t as absorbent, and it won’t ripple like paper. If you wanted, though, you could do it on plain cotton fabric and then stretch/staple over a canvas. This might call for some experimenting!
BRILLIANT!! I actually forgot about your amazing site, but followed a link from Censational Girl. Thanks for your great ideas / helpful posts!
Thanks Dawn!
Brilliant! Did you have to have more tries to get this finished project, or is this the first one you ended up with?
I did 5 or 6, but the two here are the only ones I photographed along the way. I’m still deciding how to dress up the others.
Love this!!!! Thank you for sharing!
We had snow at sea level today. I’m gonna hold off on the ice painting for a few months (I imagine leaving it to melt and coming back next day to even-more-frozen-ice!). But I’m very impatient about it!
love love love love love this!!
I’m just trying this right now, but I think they’re gonna be less pretty as yours because my cubes are too small and I think I put too much paint, so when I broke them, half was paint which is spread on my hands, so not enough water to spread color.
After 10-15 min, the advanced effect is not very exciting (the cubes was too far of each others so the colors not really melt). And I have chunk of paint in a corner of my page staying stickly there and doing nothing… XD
I’m trying to catch up adding water in the “puddles”…
So wait and see…
But even if the result is not satisfying I’ll probably try again !
Thanks for the idea ! 🙂
PS : by the way “Hello” from France ! 😉
Learn how to paint watercolor flowers in a few simple steps. Lots of great tips to make your own beautiful art in this easy tutorial!
I absolutely love this idea! I tried… but was far to impatient. I began drawing with the ice cubes….that was fun….and messy! I did not use paper but matt board so did not get the wonderful puddles I see in your work. Mineturned out ok but needs some added sparkles of paint and maybe collage.
This definately calls for session #2 using paper and patientce allowing the water and color to flow in free moving patterns of color.
Thanks for the inspiration. I would love to see your embelished ice paintings. I will also work on doing the same with my creative endeavors impulsively made.
Bernadette
first time in your blog from Centsational Girl. This is beautiful!!! I’m gonna make some for our living room.
Two questions: can I use some of the cheapo Martha Stewart or Americana acrylics? I already have some at home….
Also do you lay the papers flat all night?
Thank you
Thanks Marian! Glad to have you here. Yes, you can use just about any kind of paint, but as this post was made possible because of Liquitex and they really do make a great full body paint (and that will reflect the ‘melting’ time) I encourage it. Yes, papers lay flat all night. They will ripple up because the water will warp the edges, but leaving them alone is key.
Thank you very much! This will be a very fun project. Thank you for sharing.