
For someone who does not knit, yarn has taken over my life. And I love it. Yarn here, yarn there, yarn everywhere. My holiday situation is yarntastic like you have never seen before, but more on that later….
 t
t
This two-tone lampshade is rocking my world. Not only is it easy to make, one-of-a-kind, and inexpensive…it’s flattering as all-get-out. FOR REAL. The pink-peach yarn glow makes the light just gorgeous. And they don’t sell this color combination in stores, so, this is a DIY worth taking on. Let’s go!
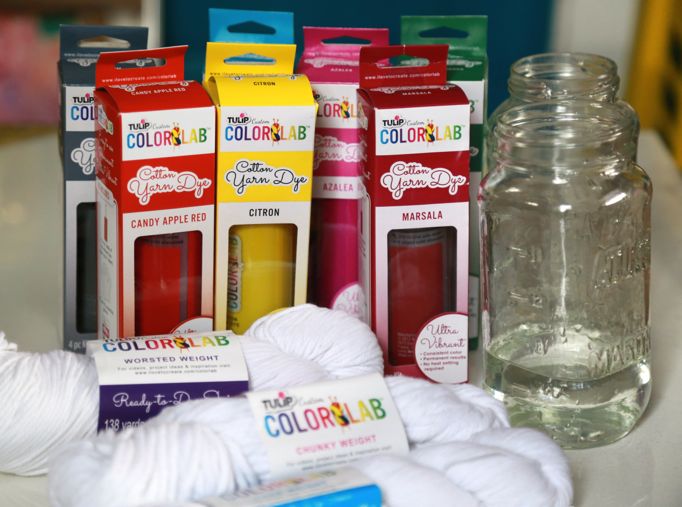
Materials to Dye Yarn
Tulip Color Lab Custom Yarn Dyes
Tulip Color Lab Yarn
Measuring spoons
Water
Glass jars or bowls
Gloves and work surface cover

This is the fun part! You get to play the mad scientist and dye all the yarns all the colors. Alllll of them. I went for a tone-on-tone color scheme here because I can never find that in stores (You ever notice that? You can find multi-color yarn in blue and orange no problem…but red and orange, or blue and green? NEVER. What’s up with that yarn manufacturers? Can’t a girl get some tasteful color variables up in here?
I digress…

For this batch I followed Tulips color guide to make creamsicle (a pale orangey peachy color) and persimmon (deep pink). A little dye and 4oz of water goes a long way!

There are limitless ways to soak your yarn with dye. I started in the jars, but then moved on to the old squirt bottle method. Both work fine, but if you want really deep colors the soaking method would probably work best.
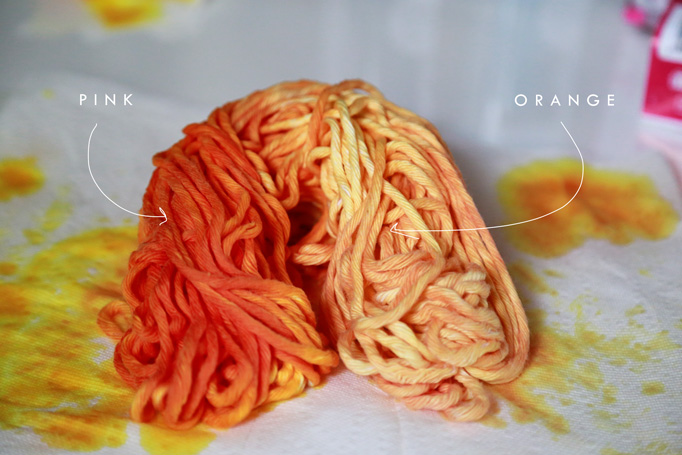
Let the yarn sit for a while. I was impatient and rinsed after a couple of hours, but you could let it go all night. Follow with a good rinse of cold water and tiny bit of detergent. Air dry overnight.

Materials to Make the Lampshade
Two-tone dyed yarn (dry)
Tacky tape (don’t be tempted to try this with glue – this tape is MAGICAL)

Trace the entire top edge of the lampshade with the fabric fusion tape, using your fingers to rub it in really well.

Carefully secure the yarn on to the tape and start winding. When you reach the begining, nudge the yarn down a line and circle agin. And again. And agin. You don’t need to cover the entire shade with tape, but if you may find it easier to add a vertical line of tape along teh vertical seam of the shade (but trust me – it’s pretty easy without). When you get the the bottom, add another circle of tape along the edge.

Whamo! Now that’s a lampshade! The color variations are subtle, but believe me, in person it’s a knockout. And the light comes through at night is the most gorgeous way!
If you are a yarn person, this stuff is going to rock your world. Your yarn stash will never be the same!
This post was brought to you by Tulip’s Color Lab yarn dye kits. All opinions expressed are my own. Thank you for supporting the brands that make this site possible!
This is a cool project! i also really really like the pink flamingo tape dispenser in some of the pictures!
So the fact that there’s no adhesive on most of the shade has me worried. Will this shade start losing it’s yarn after a month or so? What happens if you put tacky glue on the shade?
No. If you put a rim of the Tacky tape at the top and bottom it will hold just fine. I mentioned above you can use a vertical line of tape up the side for extra hold if you want, but it’s not necessary. the tacky tape is VERY strong. Liquid glue has two disadvantages; 1. if you do a line along the top rim you’ll have to wait for it to dry thoroughly before doing the rest (or use clamps) 2. Even clear glue will leave visible blobs on the lampshade that will appear when the light is on. No good. Tape is a game changer!
Great idea!!
Just this week I had the startling thought that if I wanted a cotton crochet rug in all the right colours I’d have to dye them myself… and here you are, with all the answers! My only struggle will be finding the brand (or a substitute) at a reasonable price in Australia..
Oh, this is great! I always wished to do something wound around a lampshade, but never ever thought of tape top and bottom. I hate glue, hate it with a passion. Pinning this immediately!!!