It’s the first day of September. You know what that means?
It’s pumpkin season. Heyo!

Michael’s asked me to decorate one of their foam pumpkins as part of their Michael’s Makers program and I was like, No problemo. Bring on the fall!

If you have followed the blog lately you know I got rid of a ton of scarves recently. Most of them are now at Goodwill but I snagged a few last minute thinking they would be great for this project. I have a long history of decoupaging pumpkins with paper, but fabric? That’s new. Turns out, silk scarves are ideal for this type of project. The end result is gloriously patterned and all kinds of festive. Want to make one?
Yeah. You do.

Materials
Foam pumpkin
Mod Podge (I like the gloss finish variety but it’s a matter of preference)
Silk scarf (see note on various kinds of scarves below)
Scissors
Old paint brush

Start by drizzling a generous amount of mod podge over the surface of the pumpkin, then brush it out. I like to let the mod lodge sit out a few minutes before adding the next layer. It seems to make things stickier. That might just be in my head, but I’m saying out loud and on the internet so it must be true.
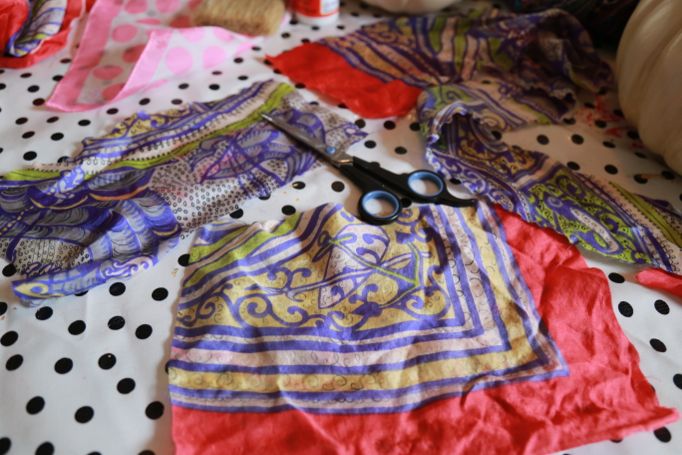
Cut your scarf into smallish-squares. Mine here are around 4″, but you would want smaller for a smaller pumpkin, and larger for a larger pumpkin. No strict science here, just know that the more severe the curves, the narrower you will want the strips.
What kind of scarf? As thin and silk-like as possible. I started with project with three scarves but ended up only using one because the other two were too thick and did not lay flat, even when soaked with Mod Podge (that’s polyester for you). Also, natural fibers will absorb the glue much easier, so try to find that if you can. Lucky for all of us, thrift stores are usually pretty stacked with old silk scarves. Trust me.

Now brush your silk squares onto the pumpkin. cover completely, then let it dry over night.

After it dried, I decided to add a few sequins with Tacky Glue, but a more tasteful person would probably do without. The pursuit of tastefulness doesn’t really happen a lot around here though…

TaDa! That’s it. A patterned, funky, one-of-a-kind pumpkin ready to rock your socks off all the way through October!
Looking for more pumpkin decor ideas? Good news – here are 49 more!
Niiiiice!! Absolutely love the silk scarf approach. xo
beautiful peaches! i have always had a soft spot for scarves, and this is just another reason to! happy september! -jennifer
Love this so hard!
Oh. My. Word. That’s GOURD-geous! (See what I did there? Yeah. It’s Invent-a-Word Wednesday.)
I have a dresser drawer full of fashion scarves from the 70’s and 80’s–many of them are silk–and while I just can’t bring myself to get rid of them, I think I could summon the courage to cut up a few in the name of crafty decor. Thanks for a great Labor Day weekend project idea!
Gorgeous!
GOTTA have the bling..no two ways around it
So pretty! Silk scarves are probably easier to work with than thin papers as well. I see one of these in my future!
Beautiful and so creative! 🙂
I love your idea of using a silk scarf! I wonder if I could do the same thing with an old shirt or something. This year, I opted for chalkboard pumpkins that I can change to fit my mood. Right now, I’ve drawn polka dots on them, but pretty soon I’ll start counting down the days until Halloween!
Great idea! But I don’t know that I could give up any scarves. I have some ties, though that have stains.
Wonderful! When I’m done glittering everything in my house and maybe some pumpkins I’ll add some scarves to some other pumpkins. 🙂
Yes! Scarves are one more thing I buy compulsively not knowing what will ever become of them. Love this!Thank you.
How pretty! -Marci @ Stone Cottage Adventures
I made a few of these. I love the way they turned out. I posted picture of them on my blog with a link back to your tutorial.