I operate under the assumption that everyone knows how to decoupage just as everyone knows how to wipe their own ass. It’s a basic benchmark of childhood development. I’m not saying they should include it in one’s Apgar scores, but I’m also not saying they shouldn’t. Everyone needs to know how to decoupage. Boys, girls, young, old…everyone. That said, you can imagine how disturbing it is to run into and adult who is unfamiliar with this art. Or worse, someone who knows how to decoupage but avoids it for fear of mess, frustration, or unpleasant results. Unbelievable.
With that in mind, I thought I would write a post of tips and no-fail tricks that yield great results every time. If you are already a decoupage fan you might as well skip this, but if you find the process difficult or intimidating or not-worth-the mess, read on!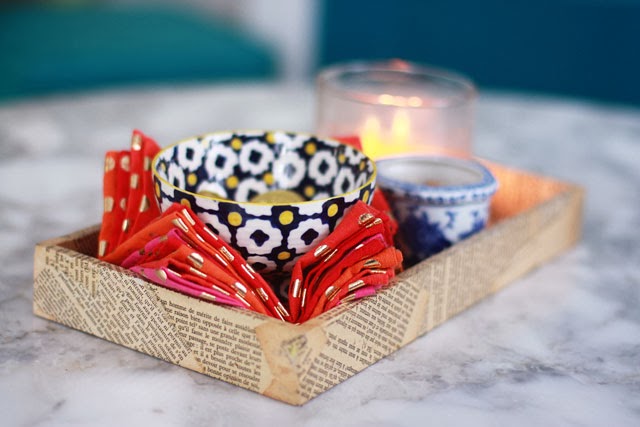
Let’s start with materials.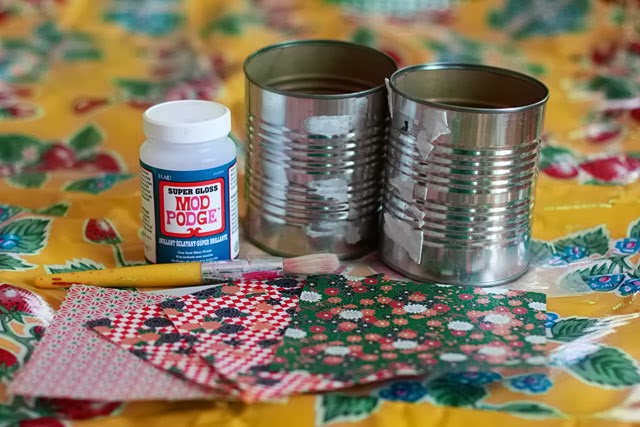
Here are the essentials…
*Adhesive. You can use most any diluted water-based glue, but favorite is Mod Podge Super Gloss. It’s thinner than the regular glossy Mod Podge and seems to absorb into paper and fabrics a little better. The finish is uber glossy and if you use a wet brush, it dries brush-stroke free. Stroke marks make the difference between something looking like a handmade treasure and a homemade craft project. A smooth finish is key. Around $8 a jar, it’s great stuff.
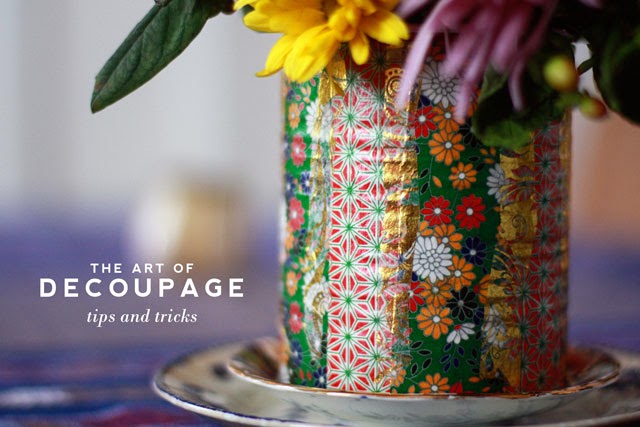
*Origami Paper. Any sort of paper will work, obviously, but thin paper is good paper, and porous paper is best. Most thin paper is coated (think pages of a magazine) but origami paper is typically left raw to allow for easy folding. It’s super thin, super absorbent, and the patterns are glorious. Thicker paper tends to sit on top of surfaces, whereas origami paper blends into it like a new skin. Like a new and sparkly kabuki show skin. Excellent alternatives: newsprint. tissue paper, coffee filters and non-coated wrapping paper.
*Firm brush. Find something with especially sturdy bristles. Something from the hardware store or that was made for toddlers to stomp around. You need something that can shift big gloopy adhesive around with as little brush strokes as possible (see under adhesive: stroke marks = bad)
*Metal cans. The beauty of decoupage is you can resurface almost anything (I even decoupaged my kitchen cabinets), however, I find these extra large cans come in hand for all sorts of storage purposes, and there is a nifty flower trick I’ll show you in a sec.
The Basics
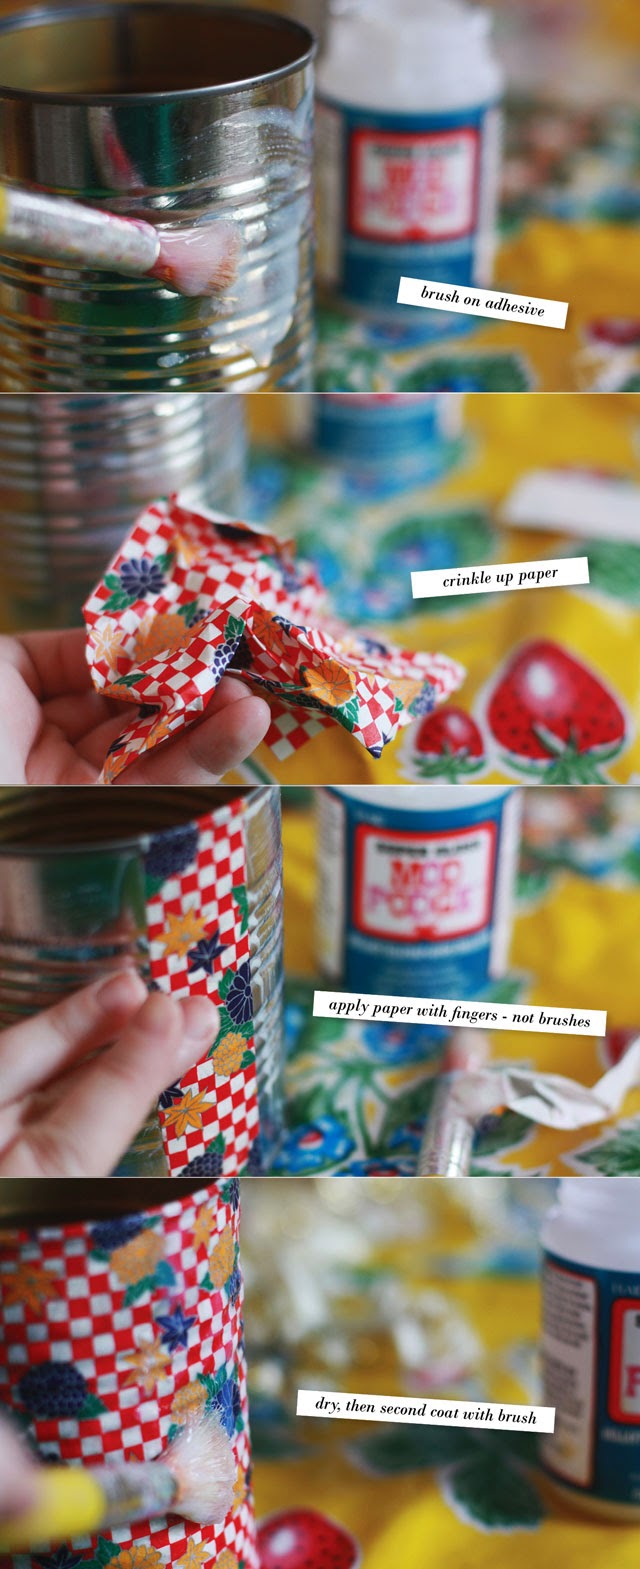
1. Use a wet brush to swipe a thin layer over the surface of the object.
2. Crinkle the paper in your hand. Crinkling is important because it will create cracks in the paper for the glue to sink into, and that will ward off lumps or air bubbles. Crinkled paper dries much smoother on the surface than non-crinkled paper, which seems backwards, but it’s not.
3. Use your fingers to smooth the paper to the surface, not the brush. Your fingers will do a much better job of smoothing it out. It will ruin your manicure, but that’s the sacrifice we make for art. Also, pay attention to edges. If you can help it, keep edges clean/non-ragged. If you can’t help messy edges, use some other accent paper to band off the edges in round 2. Again, this is one of those little steps that make a big difference!
4. After it dries, get out your wet brush again and wipe on another layer of adhesive (in my case, Mod Podge). If it looks streaky or gloppy, mist it with water. The water will dilute on surface and smooth things out.
BUT. Even if you do all that, the decoupage fairies may decide they hate you and your surface will dry rumply and less-than-perfect. That’s okay because there is a wonder drug of craft supplies: gold tissue paper.
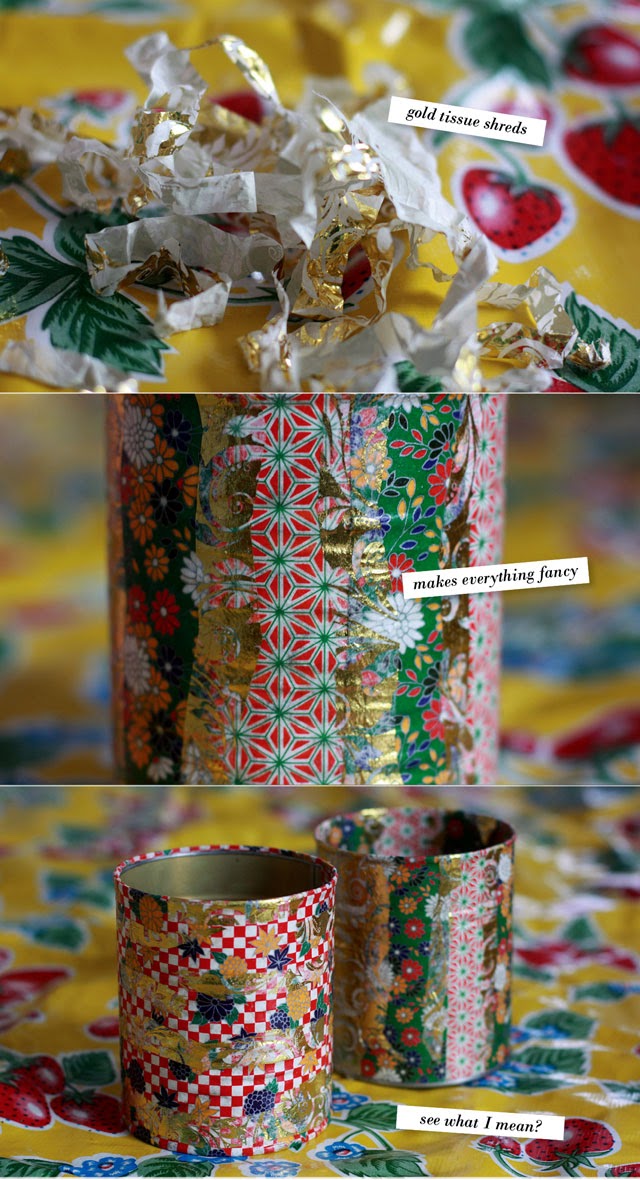
Just shred the gold tissue into strips or splotches and add another layer on top. Don’t ask me why, but you can make anything decoupage look special by adding little pieces of gold tissue paper. It’ll cover imperfections, add contrast, looks great with everything. Plus, it’s gold. Gold reads THIS IS SPECIAL. You like that.
Oh, and this is why I like those jumbo 28oz tomato cans; they are the perfect size for holding 18oz plastic cups. See…
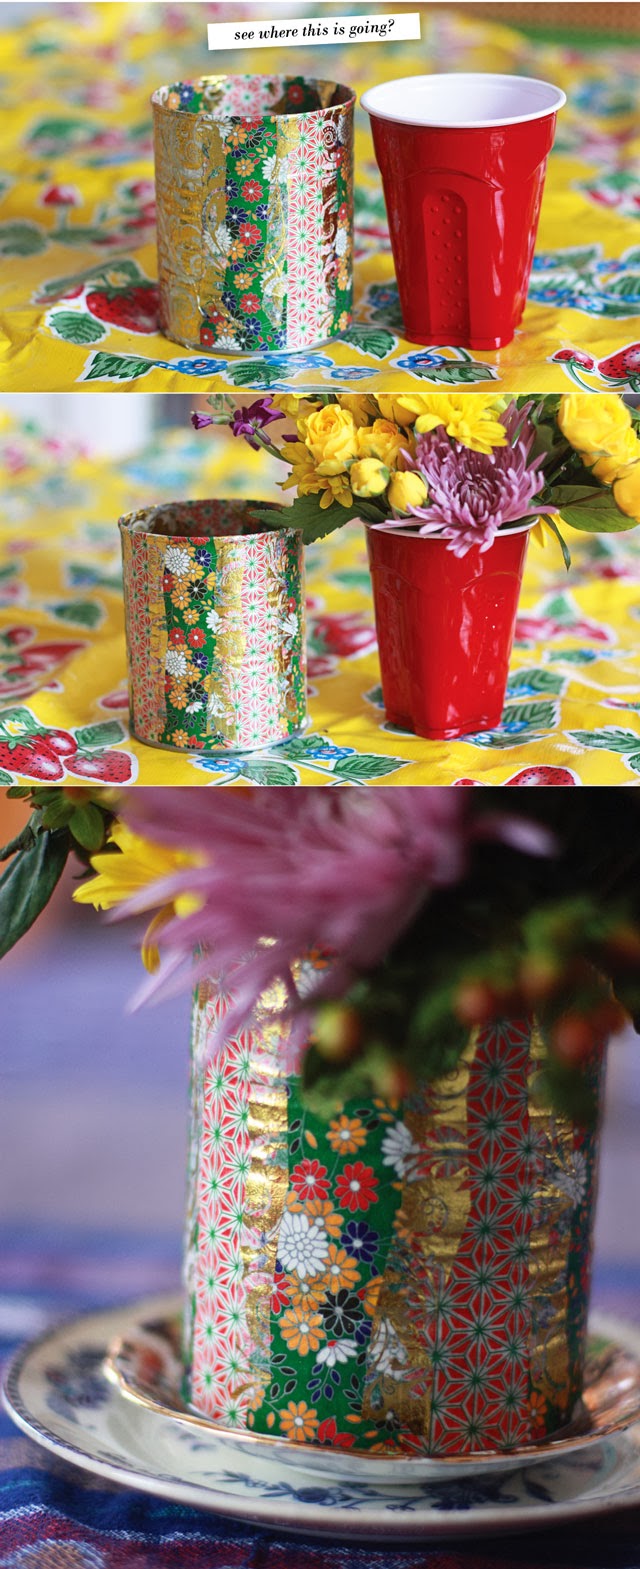
I made a bunch of these for a wedding once. The cans were a strong pattern and the flowers weren’t even flowers, just a bunch of greens. It actually pretty striking. And dirt cheap.
They make a nifty prom dress for the bulb flowers from the grocery store that last a couple of weeks.

Cute. Ness.
Happy decoupaging 🙂