
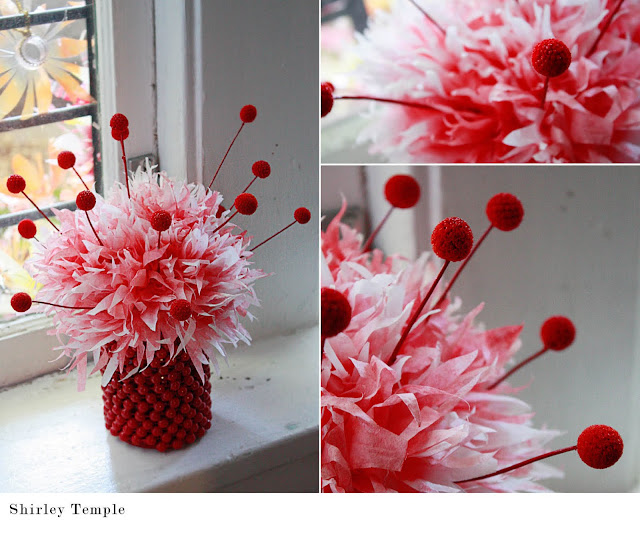
Artwork courtesy of Behr, Premium Paint Chips. Pudding Face Kitty Snoof courtesy of Tzeitel, The Cat.
Did you hear that? It’s the sound of my Crazy Cat Lady Ranking exploding. Yes, again. Totally worth it.
Kitty and the artwork belong to my friend Bird, who is not only my bestie, neighbor, and aunt to Lola, Bird is the one person who lets me hang random art experiments all over her walls. As you can see from the background on these photos, I make a lot of, um, art. This piece is an off-shoot of my birthday resolution.
Birthday Resolution? What’s that?
Why I’m glad you asked! A birthday resolution is like New Year’s resolution, but without the dieting and unpleasantness. I use it an excuse to take on a new daily habit, skill, ritual…no big whoop, just something that helps me look back on a year and feel really good about some aspect of personal growth. Feel accomplished. Make up for the serious lack of smash cake in my life. One year I learned a new word in Spanish every day. Another year I read the newspaper every morning. One year I said I would learn the ukulele…errrr…that didn’t go so well.
Last year, I said I was going to start a blog. Setting up the dang thing took ten minutes, but figuring out what sort of blog I wanted took some time! I’m big on research…started out by noting the blogs that I liked that crossed my path the first couple of months…then everyday I would comment on something I liked….then everyday I would note a post/article I liked for its content….then every commentary formula…..then every layout…the color scheme…then font face…etc, etc. Six months and a whole lot of cyber surfing later, I identified enough patterns of stuff I liked to read, and used it as the skeleton of stuff you might want to read. In July 2010 this blog was launched. Let me tell you, for all the buildup, it started out, uh, shall we say, anti-climactic. But now, it is one year since the journey began and y’all are here and reading this. Goal accomplished. Give myself a cookie!
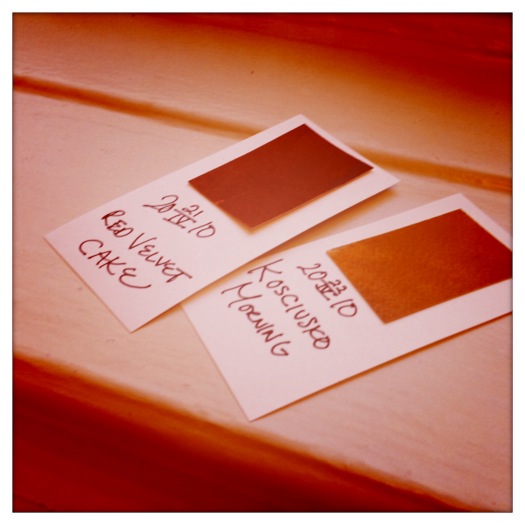
This year, my little ritual is something closer to a journal. I’m not big on keeping a diary, but a small memento to take away the sentiments of the day would be nice. Playing off my old 1,200 Names for Yellow piece, I’m going to name colors. I made myself a stack of blank swatch cards and grabbed a lot of painting scraps….a little snip and a dab of glue, I’m in business. For the next year, every night, last thing I‘ll do is select a color card and write down a name and date. I know this sounds very artsy fartsy, but really, all I’m trying to do is make a memory. My hope is that at the end of the year I can randomly pick up a card dated March 31, 2010, with a blue swatch called “STORM CLOUD” and recall that was the day I got stuck on the train in a tremendous thunderstorm and met a charming lady in a straw hat sitting behind the bearded man who smelled of Amstel Light.
You see, it’s all very logical.
So, 365 days in the year means I need a lot of color swatches. Initially I was going to rely on paint swatches from the hardware store, but decided it would I wanted to make use of the piles of scraps in my craft stash. Problem was, I already started grabbing pinches of paint swatches from various hardware stores. What to do what to do what to do?
Art! The answer is always art.
There are so many cool people out there making amazing stuff with paint chips. This one is easy, but you should check out some of the possibilities. I initially saw something similar to this in a model home five or six years ago. It was a giant 6’x8’ piece in a simple dining room with one of those glass tables. It was the first piece you saw when you walked through the door and I just thought WOWZERS I WANT ME SOME OF THAT. I apologize for not crediting the original artist, if you happen to know, please feel free to let me know. I’m big on giving credit where credit is do.
One painters canvas from the art or craft store (can also just paint a board white)
Paint chips
Foam Mounting tape
Bias tape or ribbon to run around the edge of the canvas.
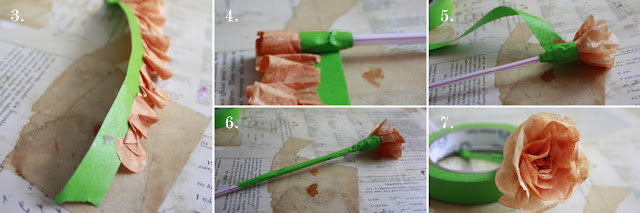
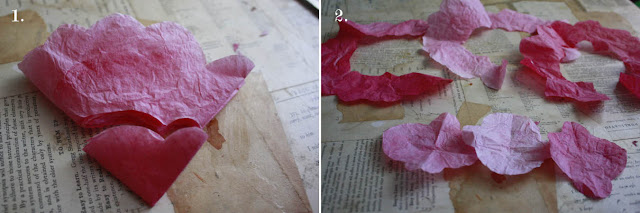
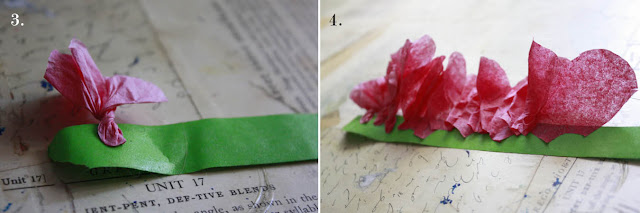
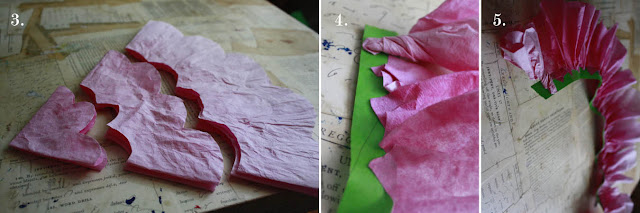
This is so quick/cheap/easy, it hardly warrants a tutorial
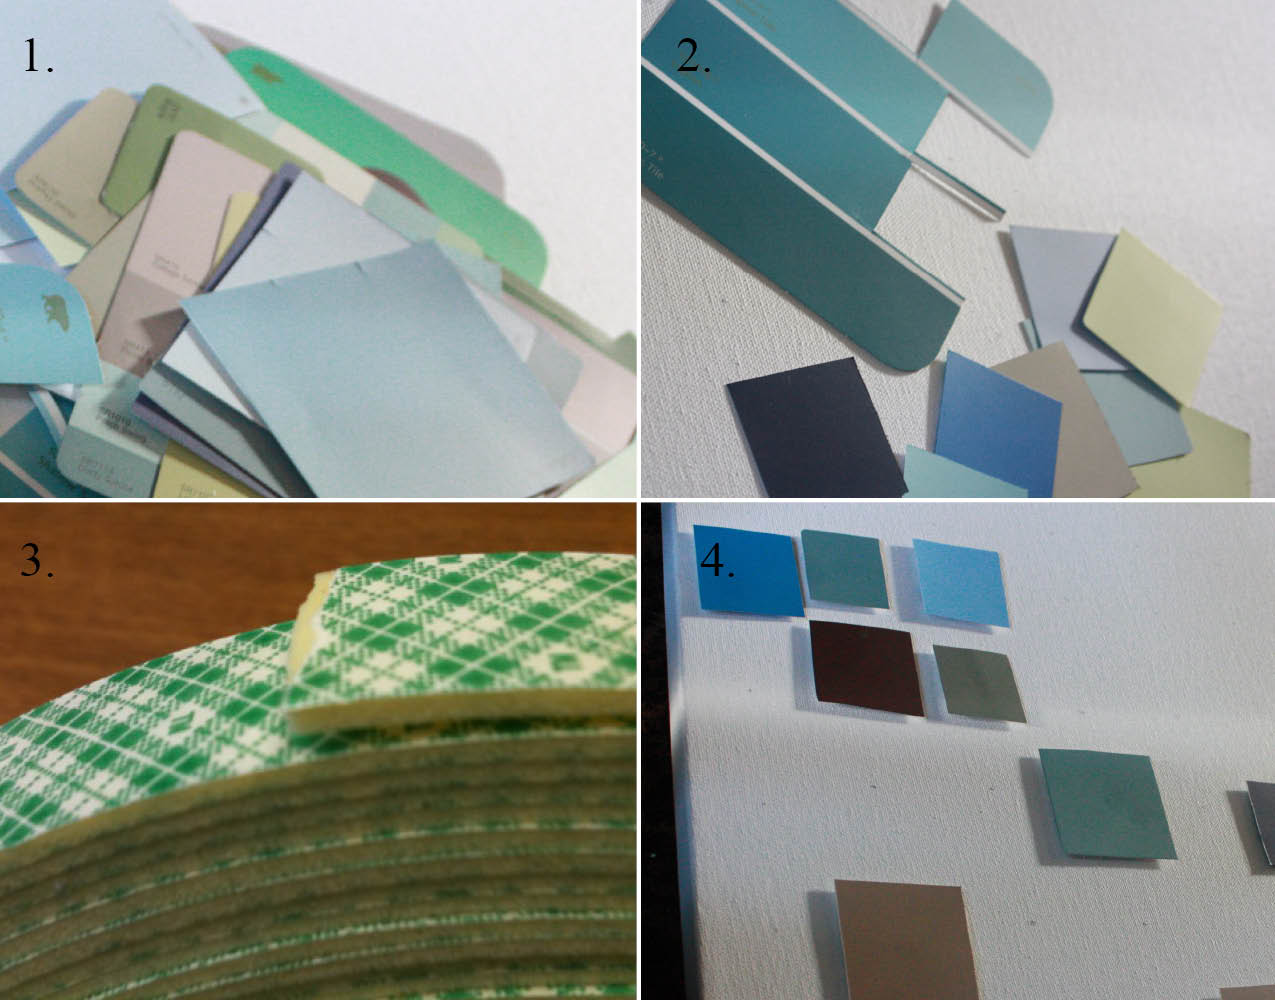
1. Get yourself a bunch of paint chips (go rainbow, or coordinate your home interior)
2. Cut out squares of solid color. You could try to make them the exact same size, but that would drive me crazy. I just eyeball to keep them within half an inch of each other.
3. Tear off 1” squares of foam mounting tape. Mounting tape is super sticky, very durable, and more important, it will raise your color squares off the canvas just a tiny bit. The shadow it gives really sets them off. You could just hot glue them to the canvas, but the foam tape makes a BIG DIFFERENCE. Give it a chance!
4. Figure out roughly how many squares you can fit running the length and width of your canvas. You can try to line them up exactly, but again, that would drive me nuts! This isn’t brain surgery, so don’t take it so seriously. Just stick them up and go for it! No one is going to notice if some of them are slightly skewed or off center. In fact, it will enhance the overall character and charm of the piece. Embrace imperfections!!
Hot glue some ribbon or bias tape around the edge and SHAZAM you are done!
I’m generally not big on the concept of “filler art”…Personally, I would rather live with an empty wall then buy something just to fill the space. However, this piece is sort of a happy medium. There is no great thought or skill in making it, but by gosh, it makes for crazy eye candy!


